Physical Address
304 North Cardinal St.
Dorchester Center, MA 02124
Physical Address
304 North Cardinal St.
Dorchester Center, MA 02124

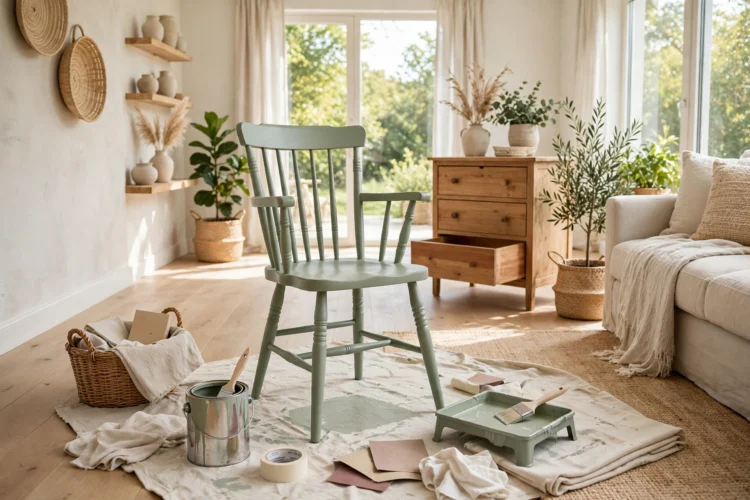
Twelve furniture makeovers scoped to a Friday night prep plus one workday, with drying times factored into each plan.
A furniture makeover fails when the plan ignores drying time. Paint needs hours between coats, stain needs a full day to cure, and glue needs an overnight clamp. Weekend furniture makeover projects work because they build that waiting into the schedule: Friday night is for prep, Saturday is for work, and Sunday morning is for hardware and styling. The twelve projects below follow that shape. Each one lists what to do Friday night, what to do Saturday, and when the piece is ready to use. Pick the piece you already own, check that it is solid underneath the scratches, and start Friday.
A painted dresser is the classic furniture painting weekend project, and it works because the prep is simple. Friday night, remove the drawers and hardware, wash the dresser with sugar soap, and sand the whole piece with 120-grit sandpaper until the old shine is gone. Saturday morning, brush on a coat of primer, let it dry for two hours, then roll on two thin coats of furniture paint, waiting at least three hours between coats. Sunday morning, fit new handles: brass pulls on a navy dresser, black knobs on a white one. The paint feels dry to the touch in a few hours, but it needs a full 24 hours before you slide the drawers back in and load them. A six-drawer dresser takes about five hours of actual work spread across the weekend, and the new hardware does half the visual work. For styling ideas once the dresser is done, these bedroom dresser styling ideas that look curated show how to dress the top without cluttering it.

A nightstand is small enough to finish in a single day, which makes it the best first makeover for a beginner. Friday night, clean it, remove the knob, and sand any rough spots. Saturday, brush on two coats of chalk paint, which dries fast and needs no primer on most wood, then seal it with clear wax rubbed in with a lint-free cloth. The wax needs four hours to set before you put a lamp or a book on top. A chalk-painted nightstand suits a bedroom where the rest of the furniture is wood: the painted piece breaks up the matchy set and adds a soft color. Swap the knob for a ceramic or glass one and the nightstand looks bought, not rescued. For more nightstand styles to match your new piece, these nightstand ideas beyond the matching pair show how a single statement nightstand can anchor a bedroom.

A coffee table with water rings and scratches comes back to life with a weekend of sanding and oiling. Furniture refinishing like this one takes patience, not skill: the sander does the hard work. Friday night, strip the old finish with a chemical stripper or a random orbit sander, working through 80-grit, then 120-grit, then 220-grit paper. Saturday morning, wipe the dust off with a tack cloth and brush on a coat of Danish oil, which soaks in and hardens in the wood rather than sitting on top. Apply a second coat after four hours, then leave the table untouched overnight so the oil cures. Sunday, rub the surface with a soft cloth and the grain glows. The same weekend also covers a matching end table, since the sander and the oil are already out and the second piece adds only an hour of work. A refinished table suits a living room where the wood tone matches the floor or the shelving, and it ages well because oil can be reapplied whenever the surface dulls.

Dining chairs with tired fabric take one weekend to reupholster, and the job needs no sewing at all. Friday night, flip each chair, unscrew the seat, and pull off the old fabric and staples with pliers. Saturday, cut new fabric two inches larger than the seat on every side, center the foam pad, and staple the fabric to the underside of the seat, pulling it tight and folding the corners like wrapping a gift. A staple gun and a pack of staples are the only tools, plus scissors and a screwdriver. Four chairs take about three hours, and the fabric is the only real cost. Choose a wipeable fabric for a family dining room, since chairs take spills that a sofa never sees. Reupholstering the seats also lets you keep the chair frames you already like, which is cheaper and faster than buying a new set.

Two small tables make one weekend project when they share paint and supplies. Friday night, clean and sand a side table and a tray table, and tape off any parts you want to keep bare. Saturday morning, paint both pieces in the same base color, then stencil a pattern on the side table top with a stencil brush and a second color, dabbing the paint on lightly so it never bleeds under the stencil edge. Paint the tray table in a solid accent color to match the stencil. Both pieces dry by Saturday evening, and the stencil work takes under an hour once the base coat is dry. The pair works in a living room as a side table and a drinks tray, or in a bedroom as a nightstand and a breakfast tray. Stenciling suits a plain table that has good bones but a boring top, and it costs less than a new table by a wide margin.

A bookshelf stained a new color changes a whole wall without moving any furniture. Friday night, empty the shelves, sand the piece with 120-grit paper, and wipe it down. Saturday, brush on a gel stain, which sits on the surface and works well over an old finish that you have only lightly sanded. Gel stain dries in about six hours, and a second coat deepens the color. Sunday morning, seal it with two coats of clear polyurethane, waiting two hours between coats, and let the shelf cure overnight before you reload the books. A matching wall shelf gets the same treatment in the same weekend, since the stain and the brush are already open. A dark walnut stain makes a light pine bookshelf look like a serious piece of furniture, while a gray wash keeps a bright room feeling airy. For styling the shelves once they are back in place, these living room bookshelf styling ideas show how to mix books, plants, and objects so the shelf looks collected.

An old dresser becomes a kitchen island with a new top and four casters. Friday night, remove the top drawers, clean the dresser, and measure for a butcher block top that overhangs by one inch on each side. Saturday, screw the butcher block top on from underneath, fit four locking casters to the base, and paint or stain the body to match the kitchen. The casters let you roll the island where you need it, and the remaining drawers hold towels, pans, and baking sheets. This dresser makeover turns storage you already own into the most-used surface in the kitchen. Seal the butcher block top with food-safe mineral oil, applied in two coats with four hours between them, and re-oil it once a month. The island is ready to use Sunday morning, once the oil has soaked in. For more rolling island inspiration, these rolling kitchen island ideas for flexible space show how a movable island fits kitchens where a fixed one never could.

A headboard refresh takes a weekend because the fabric and the padding need time to set. Friday night, remove the headboard from the bed frame and lay it flat. Saturday morning, cut a layer of batting one inch larger than the headboard on every side, then cut your fabric two inches larger than that. Staple the batting to the back of the headboard, then staple the fabric over it, pulling it tight and folding the corners neatly. A button-tufted look comes from pulling the fabric through with long upholstery needles, but a flat padded headboard looks just as good and takes half the time. Hang the headboard back on the wall Sunday morning and make the bed. A linen fabric in a soft neutral suits most bedrooms, and the padding makes leaning back to read far more comfortable than bare wood. Pair the new headboard with a fresh wall treatment, like these bedroom accent wall ideas with paint, panels, and wood, and the whole room feels redone.

A console table with a painted base and a stained top is a two-tone makeover that suits an entryway or a hallway. Friday night, sand the table and tape off the top. Saturday morning, paint the legs and apron in a solid color, then stain the top a warm wood tone once the paint is dry to the touch. The stain needs six hours to dry, and the whole piece needs a clear topcoat before you set anything on it. Sunday, add a tray, a vase, and a small stack of books, and the table is done.

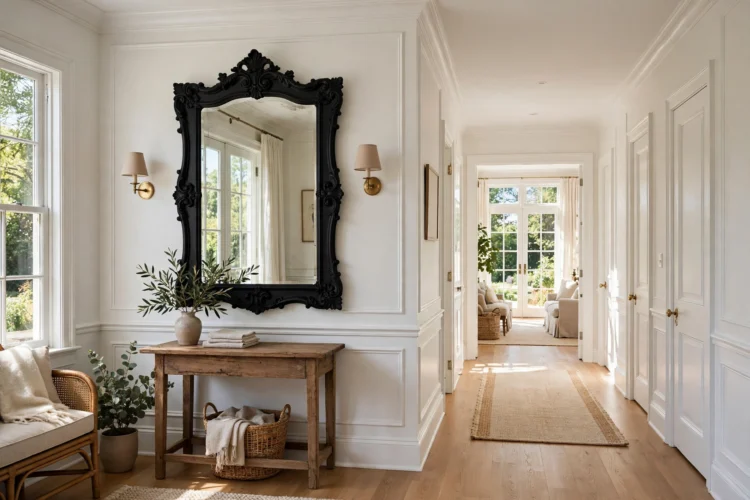
A mirror with a dated gold frame takes one afternoon to restyle, which makes it the easiest project on this list. Friday night, clean the frame and tape off the glass with painter’s tape, pressing the tape edge down firmly so no paint creeps under it. Saturday, brush on two thin coats of paint, matte black for a modern look or soft white for a farmhouse feel, waiting two hours between coats. Sunday morning, peel the tape off and hang the mirror. A painted mirror frame suits a hallway, a bedroom, or a bathroom, as long as the paint is sealed with clear varnish in a humid room. The same weekend also covers a matching picture frame: same paint, same brush, ten extra minutes, and the two pieces look like a set. A mirror makeover costs almost nothing, but it changes how light moves through the room.
Twelve projects, one weekend each, and none of them needs a new piece of furniture. These weekend furniture makeover ideas all follow the same rule: prep on Friday, work on Saturday, and let the finish dry before you use the piece. Skip the drying time and the paint peels, the oil stays tacky, and the weekend is wasted. Respect it, and the piece you already own becomes the one you keep.